Development
Contributing guidelines
This is a learning project.
People have different usage scenarios, UI preferences, etc. It is not possible to fit everything into a single firmware.
All feature requests, ideas, observations, questions and answers should go into the Discussions section.
Issues should be used only for bugs and planned tasks.
Pull Requests are not guaranteed to be accepted, unless the maintainer(s) consider them suitable for the majority of users. Documentation, bugfixes and code quality improvements are usually welcome! If in doubt, please propose your contribution as a Discussion first.
You are encouraged to make your own custom firmware forks! Feel free to share a link to your firmware version in the Discussions. Interesting features or color themes might be included into the ATS Mini firmware.
Video tutorial
A short video tutorial on how to build a custom firmware version (YouTube mirror):
Compiling the source code
Install Arduino CLI.
Go to the repository root folder
Compile and flash the firmware
arduino-cli compile --clean -e -p COM_PORT -u ats-mini
When a library gets upgraded in the sketch.yaml project configuration file, it might be necessary to run the following commands to ensure that the Arduino CLI has the most current information about available platforms and libraries:
arduino-cli core update-index
arduino-cli lib update-index
Compile-time options
The available options are:
HALF_STEP- enable encoder half-steps (useful for EC11E encoder)LILYGO_SI473X- compile for LILYGO T-Embed SI4732 hardware variantBLE_POWER_LEVEL- Bluetooth LE TX power level (default:ESP_PWR_LVL_N0). Possible values areESP_PWR_LVL_N24,ESP_PWR_LVL_N21,ESP_PWR_LVL_N18,ESP_PWR_LVL_N15,ESP_PWR_LVL_N12,ESP_PWR_LVL_N9,ESP_PWR_LVL_N6,ESP_PWR_LVL_N3,ESP_PWR_LVL_N0,ESP_PWR_LVL_P3,ESP_PWR_LVL_P6,ESP_PWR_LVL_P9,ESP_PWR_LVL_P12,ESP_PWR_LVL_P15,ESP_PWR_LVL_P18, andESP_PWR_LVL_P20.WIFI_POWER_LEVEL- Wi-Fi TX power level (default:WIFI_POWER_17dBm). Possible values areWIFI_POWER_21dBm,WIFI_POWER_20_5dBm,WIFI_POWER_20dBm,WIFI_POWER_19_5dBm,WIFI_POWER_19dBm,WIFI_POWER_18_5dBm,WIFI_POWER_17dBm,WIFI_POWER_15dBm,WIFI_POWER_13dBm,WIFI_POWER_11dBm,WIFI_POWER_8_5dBm,WIFI_POWER_7dBm,WIFI_POWER_5dBm,WIFI_POWER_2dBm, andWIFI_POWER_MINUS_1dBm.
To set an option, add the --build-property command line argument like this:
arduino-cli compile --build-property "compiler.cpp.extra_flags=-DHALF_STEP" --clean -e -p COM_PORT -u ats-mini
For example, to lower Bluetooth LE and Wi-Fi TX power:
arduino-cli compile --build-property "compiler.cpp.extra_flags=-DBLE_POWER_LEVEL=ESP_PWR_LVL_N12 -DWIFI_POWER_LEVEL=WIFI_POWER_13dBm" --clean -e -p COM_PORT -u ats-mini
Using the make command
You can do all of the above using the make command as well:
HALF_STEP=1 PORT=/dev/tty.usbmodem14401 make upload
To set Bluetooth LE and Wi-Fi TX power with make:
BLE_POWER_LEVEL=ESP_PWR_LVL_N12 WIFI_POWER_LEVEL=WIFI_POWER_13dBm PORT=/dev/tty.usbmodem14401 make upload
Decoding stack traces
To decode a stack trace (printed via serial port) use the following tool: https://esphome.github.io/esp-stacktrace-decoder/
Enabling the pre-commit hooks
Install
uvhttps://docs.astral.sh/uv/getting-started/installation/Run
uv syncrun
uv run prek install
Adding a changelog entry
Install
uvhttps://docs.astral.sh/uv/getting-started/installation/Run
uv syncCreate an entry:
uv run towncrier create --edit ID.CATEGORY.md
IDis an issue or a PR number, or+STRINGif there is no issue/PR.CATEGORYis one ofadded,changed,fixed, etc. see thetool.towncrier.typesections in thepyproject.tomlfor the full list.
Improving the documentation
Install
uvhttps://docs.astral.sh/uv/getting-started/installation/Run
uv syncRun a local webserver
uv run sphinx-autobuild docs/source docs/buildand open the http://127.0.0.1:8000 in a browserEdit the Markdown files in
docs/sourcefolder and immediately see your changes reflected in the browser
Theme editor
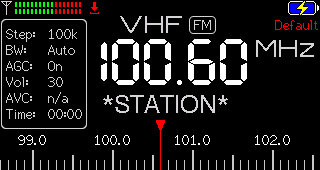
A terminal command T toggles a special mode that helps you pick the right colors faster without recompiling and flashing the firmware each time. When the theme editor is enabled, some screen elements are always visible (and various status icons change their state every couple of seconds):
Press @ to print the current color theme to the serial console:
Color theme Default: x0000xFFFFxD69AxF800xD69Ax07E0xF800xF800xFFFFxFFFFx07E0xF800x001FxFFE0xD69AxD69AxD69Ax0000xD69AxD69AxF800xBEDFx0000xF800xFFFFxBEDFx105BxBEDFxBEDFxFFFFxD69AxF800xFFE0xD69AxFFFFxF800xC638
Then copy the theme to your favorite text editor, change the colors as you see (here is a handy 565 color picker).
To preview the theme, paste it to the serial console with the ^ character appended:
^x0000xFFFFxD69AxF800xD69Ax07E0xF800xF800xFFFFxFFFFx07E0xF800x001FxFFE0xD69AxD69AxD69Ax0000xD69AxD69AxF800xBEDFx0000xF800xFFFFxBEDFx105BxBEDFxBEDFxFFFFxD69AxF800xFFE0xD69AxFFFFxF800xC638
Once you are happy, add the resulting colors to Theme.cpp.
Release process
Bump the
VER_APPconstant in theCommon.hfileIf the new version has a different preferences layout, bump
VER_SETTINGS,VER_BANDS,VER_MEMORIES, orVER_STORAGEas well (it will force the corresponding preferences section reset)Generate the CHANGELOG.md by running
uv run towncrier build --version X.XXAdd and commit the changes with a message like “Release X.XX”, then push them to the repository
Once the build is complete, download, flash and test it!
Tag the release and push the tag
git tag -a vX.XX -m 'Version X.XX' && git push --follow-tags(the tag should start withv!)