Flashing the firmware
Warning
Flashing the firmware can make your receiver unusable.
Before proceeding, please check whether the receiver board has BOOT & RESET buttons soldered, which can help to recover it. Also there is a way to back up the stock firmware, so you can roll back to it if you want.
Firmware files
Hint
The firmware releases are available on GitHub. You’ll need either OSPI or QSPI variant depending on the ESP32-S3 PSRAM type, see the following table:
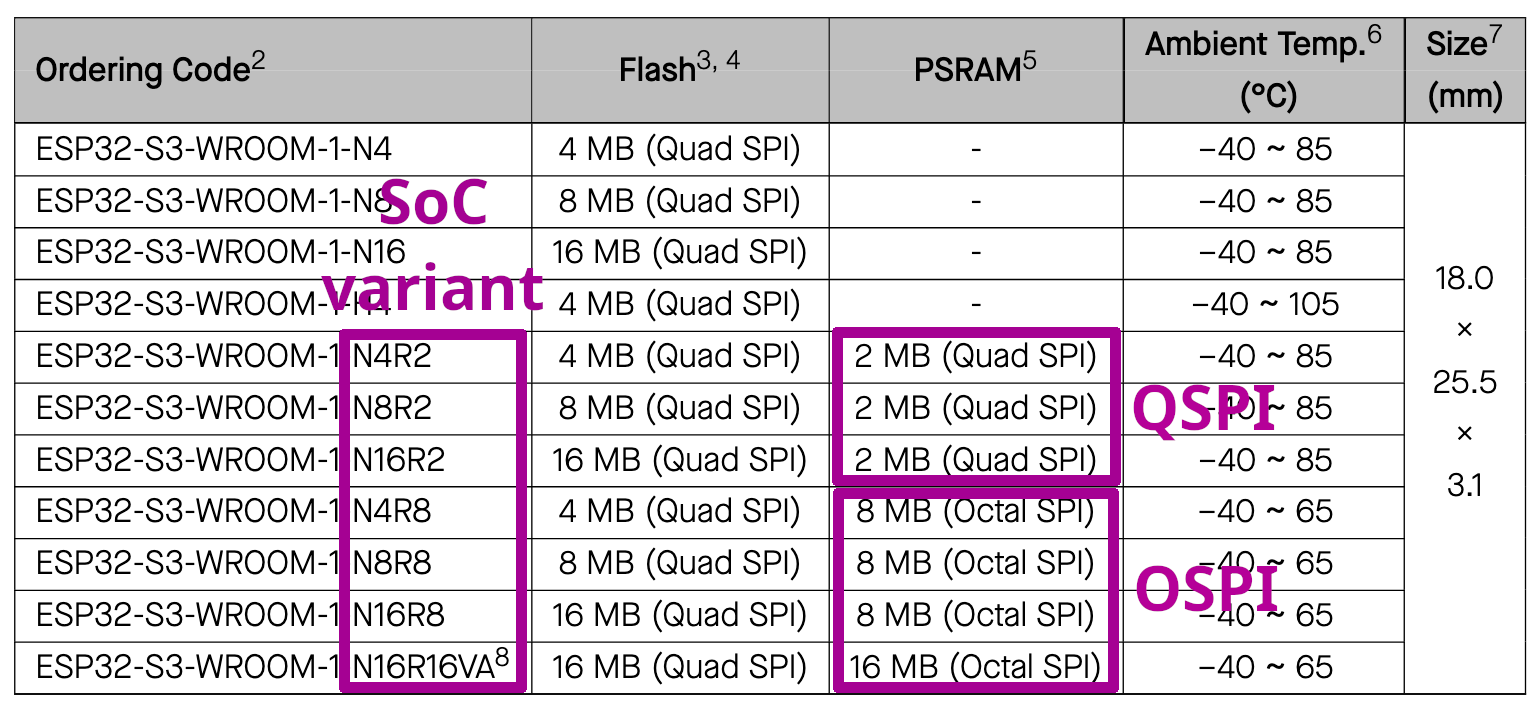
With the right firmware variant you should see a non-zero PSRAM amount on the Settings->About system info screen. Also check out the following discussion: OSPI vs QSPI: How can I see what I have?.
The lilygo-t-embed variant only works on LILYGO T-Embed SI4732 receiver. WARNING: flashing a different firmware can damage the receiver.
A firmware archive contains the following files:
CHANGELOG.md- a text file that describes what’s new in each firmware versionats-mini.ino.bootloader.bin- a bootloader (should be flashed at address0x0)ats-mini.ino.partitions.bin- a partition table (should be flashed at address0x8000)ats-mini.ino.bin- a firmware itself (should be flashed at address0x10000)ats-mini.ino.merged.bin- the three previous files combined into one (should be flashed at address0x0)
So, you need to flash your receiver using just one of the following two ways:
Flash the three files (2 -
bootloader, 3 -partitions, 4 -firmwareusing the right addresses. The receiver settings might be reset in some versions.
OR
Only flash the last file (5 -
merged) using the0x0address. The receiver settings will be always reset.
Flash using a web browser
Works on: Windows, macOS, Linux
This is the simplest method, but you need a browser that supports the Web Serial API. This means Chrome and some other browsers. No, Firefox and Safari can’t do it.
Tip
On Linux, please make sure that the user account that runs your browser has the necessary permissions to access the serial port.
Connect your receiver to a computer using USB and power it on.
A new serial port should appear. On Windows check the USB Serial COM port in the Windows Device Manager, on macOS it will look like
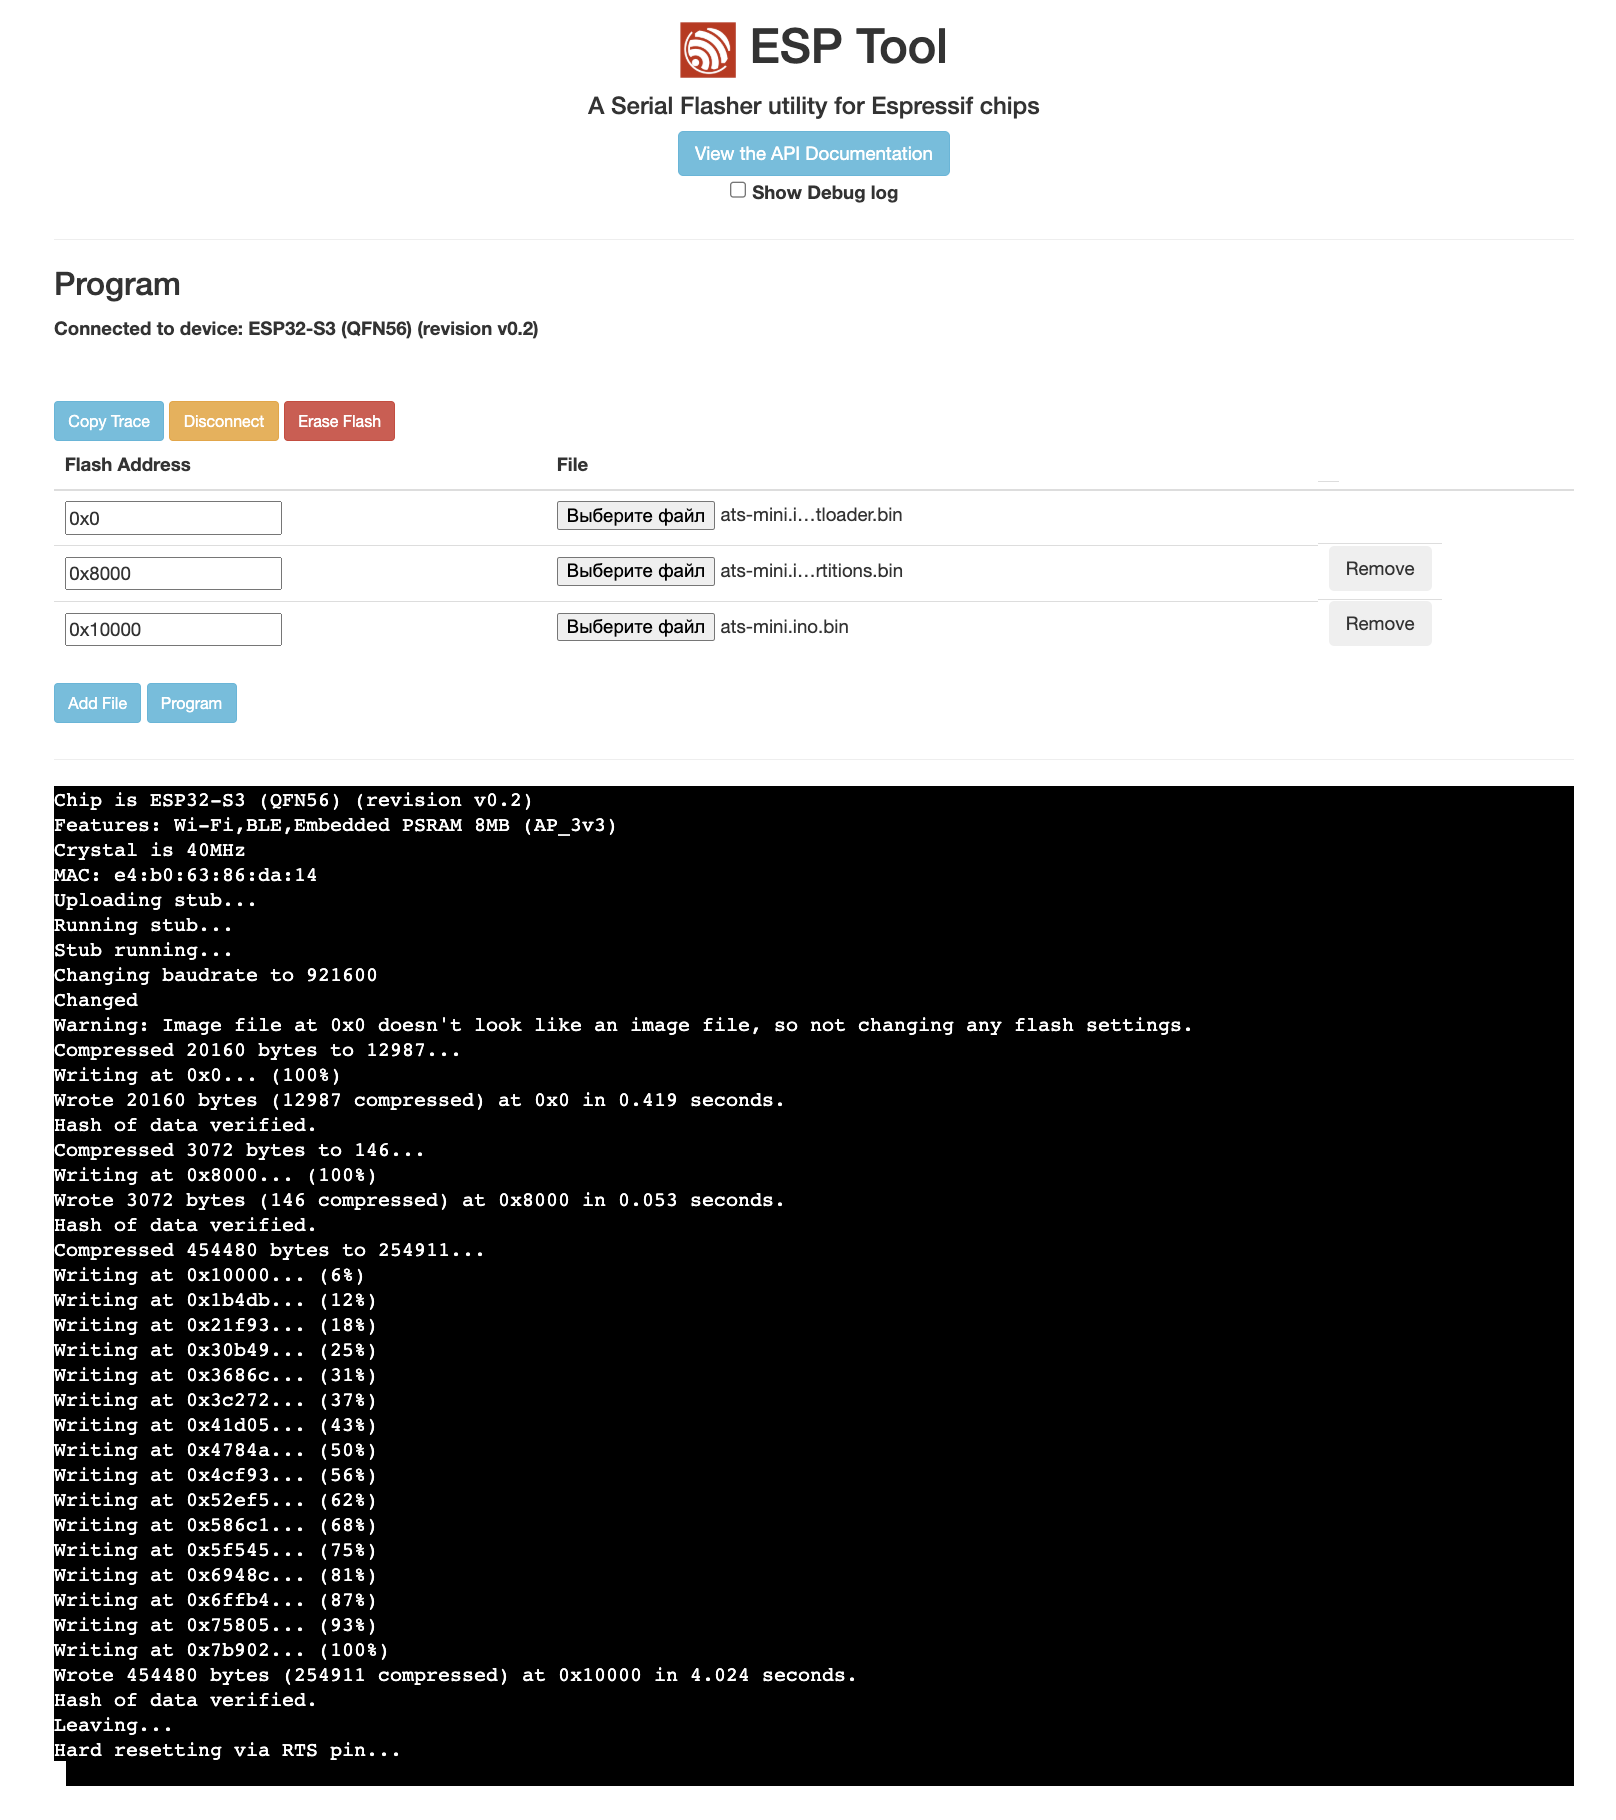
/dev/tty.usbmodemXXXX, on Linux like/dev/ttyACMX.Open the following link: https://espressif.github.io/esptool-js/
Press the
Connectbutton and choose the right serial port.Add either the three separate firmware files at the right addresses, or the merged one at
0x0.Press the
Programbutton.Wait until the following text will appear in the black serial log window:
Leaving... Hard resetting via RTS pin...Press the
Disconnectbutton.Power off and power on the receiver.
Check out the firmware version in Menu -> Settings -> About on the receiver.
Flash Download Tool
Works on: Windows
Download the Expressif Flash Download Tool, unpack the archive.
Connect your receiver to a computer using USB and power it on.
A new serial port should appear, check the USB Serial COM port in the Windows Device Manager.
Run the
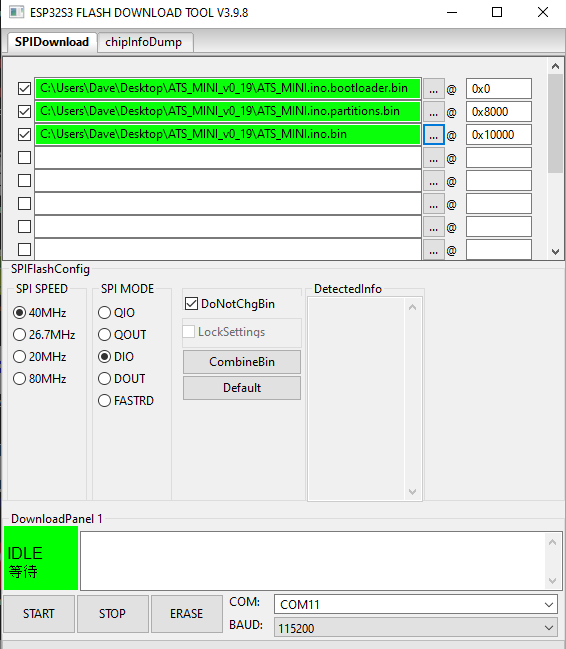
flash_dowload_toolexecutable file.Choose
Chip Type: ESP32-S3,WorkMode: Develop,LoadMode: UART.Add either the three separate firmware files at the right addresses, or the merged one at
0x0. Enable the check boxes next to the file bars.Set the COM port and other settings.
After checking all information is correct, press the
STARTbutton.Wait until the following text will appear in the black log window:
is stub and send flash finishPower off and power on the receiver.
Check out the firmware version in Menu -> Settings -> About on the receiver.
esptool.py
Works on: Windows, macOS, Linux
Install
uv(Windows, macOS, Linux) https://docs.astral.sh/uv/getting-started/installation/Connect your receiver to a computer using USB and power it on.
A new serial port should appear. On Windows check the USB Serial COM port in the Windows Device Manager, on macOS it will look like
/dev/tty.usbmodemXXXX, on Linux like/dev/ttyACMX.Run just one of the two following commands (the first one uses three separate firmware files, the second one uses the single merged firmware file):
uvx --from esptool esptool.py --chip esp32s3 --port SERIAL_PORT --baud 921600 --before default-reset --after hard-reset write_flash  -z --flash-mode keep --flash-freq keep --flash-size keep 0x0 ats-mini.ino.bootloader.bin 0x8000 ats-mini.ino.partitions.bin 0x10000 ats-mini.ino.bin

# OR

uvx --from esptool esptool.py --chip esp32s3 --port SERIAL_PORT --baud 921600 --before default-reset --after hard-reset write-flash  -z --flash-mode keep --flash-freq keep --flash-size keep 0x0 ats-mini.ino.merged.bin
Check out the firmware version in Menu -> Settings -> About on the receiver.